

Before you can really start automating tasks in your DXP, you need to get your development environment set up and wrap your head around a few core PowerShell concepts. This means installing the right PowerShell version and grabbing the essential modules, like Sitecore PowerShell Extensions (SPE) for Sitecore or PnP.PowerShell for SharePoint. These modules give you the specific commands to talk to those platforms.
Once that's done, understanding the fundamentals—like cmdlets, pipelines, and objects—is what will let you turn simple commands into seriously powerful automation scripts.
Laying the Groundwork for DXP Automation

If you're managing a complex Digital Experience Platform (DXP) like Sitecore or a collaboration hub like SharePoint, automation isn't just a nice-to-have; it's an absolute necessity. Repetitive work like content migrations, updating user permissions, or managing the new Sitecore AI product portfolio can eat up countless hours and, let's be honest, open the door to human error. This is exactly where learning to create PowerShell scripts becomes one of the most valuable skills in your toolkit.
With more than a decade of hands-on Sitecore experience, we're here to share the practical know-how you need to build powerful, secure, and maintainable automation scripts. We'll skip the generic advice and jump straight into real-world applications for the Sitecore ecosystem, including its AI-driven composable products, and SharePoint solutions.
Why PowerShell for DXP and CMS Automation?
PowerShell has cemented its place as the standard for automation within the Microsoft world and far beyond. What makes it so effective is its object-oriented nature. Unlike older text-based shells, PowerShell can handle complex data structures from platforms like Sitecore and SharePoint with total precision. You’re not just fiddling with text strings; you're working directly with structured objects like Sitecore content items, Sitecore OrderCloud user profiles, and SharePoint site collections.
This object-based approach is a game-changer and a huge reason for its popularity. In fact, an incredible 113,898 companies now actively use PowerShell for their IT automation. That number alone speaks to its reliability and power. It gives you a consistent, scriptable way to manage a massive range of products, making it the perfect tool for orchestrating tasks across your entire digital environment, from Sitecore XM Cloud to SharePoint Online.
For any DXP administrator or developer, mastering PowerShell is a direct investment in operational efficiency. The time you spend building a script to automate a three-hour manual task pays dividends every single time it runs.
Core Concepts for Scripting Success
Before we start writing code, it's crucial to get a handle on the building blocks of any good PowerShell script. These concepts are universal, but they have some very specific applications when you're working with DXPs.
To get started, here's a quick rundown of the essential PowerShell concepts you'll need for DXP automation.
| Concept | Description | Example Use Case in DXP |
|---|---|---|
| Cmdlets | The basic commands, following a Verb-Noun format like Get-Item. | Using Publish-Item from SPE to publish Sitecore content, or Get-PnPList to retrieve SharePoint lists. |
| **Pipeline ( | )** | A powerful feature that passes the output of one command as the input to the next. |
| Objects | Unlike text-based shells, PowerShell passes rich .NET objects between commands. | Running Get-Item in SPE gives you a full Sitecore item object, complete with all its fields and methods. |
| Modules | Packages of cmdlets, functions, and variables that extend PowerShell's capabilities. | Installing Sitecore PowerShell Extensions (SPE) or PnP.PowerShell to interact with Sitecore and SharePoint. |
Getting these four concepts down is the key to unlocking PowerShell's true potential for automating your DXP tasks. Let's dig a bit deeper into each one.
Cmdlets (Command-lets): These are the verbs of PowerShell. They follow a simple
Verb-Nounpattern, making them easy to discover and remember (e.g.,Get-Item,Set-Content). For our world, the Sitecore PowerShell Extensions (SPE) module adds hundreds of DXP-specific cmdlets likeGet-ChildItem(for Sitecore items) andPublish-Item. Likewise, the PnP.PowerShell module for SharePoint gives youGet-PnPListandAdd-PnPListItem.The Pipeline (|): The pipeline is arguably PowerShell's most powerful feature. It lets you chain commands together, passing the output of one cmdlet directly to the next. This is how you perform complex operations in a single, clean line of code. For instance, you could get a list of Sitecore items, filter them by a specific template, and then publish them all in one go.
Objects: This is a big one. Traditional shells pass around simple strings of text. PowerShell, however, passes rich .NET objects between its cmdlets. When you run
Get-Itemin SPE, you aren't just getting the item's name; you're getting the entire Sitecore item object, with all its fields, properties, and methods ready for you to work with.Modules: PowerShell gets its real power from modules. These are just packages of cmdlets, functions, and other resources that extend what PowerShell can do. For us, the most critical modules are Sitecore PowerShell Extensions (SPE) for Sitecore and PnP.PowerShell for SharePoint. The very first step in any automation script is making sure you have the right modules installed and imported.
Building Your First Sitecore and SharePoint Scripts
Alright, enough with the theory. It’s time to get your hands dirty and create PowerShell scripts that solve real problems. This is where you’ll see the true power of automation come to life in your Sitecore and SharePoint environments.
We’re going to focus on two common, yet often tedious, tasks. First, we’ll use the Sitecore PowerShell Extensions (SPE) to perform a bulk update on item templates—a lifesaver during a content model refactor. Then, we’ll switch gears to SharePoint and build a script to archive old, forgotten documents.
Automating Sitecore Template Changes With SPE
Any Sitecore project that lives and breathes will eventually need its content templates updated. Doing this manually across hundreds or thousands of items is a recipe for mistakes and wasted afternoons. With SPE, we can get it done in minutes.
The goal here is simple: find every item using an old template within a specific part of the content tree and swap it for a new one. This script uses the PowerShell pipeline to pack a lot of power into just a few lines.
# Define the root path, old template, and new template$rootPath = "master:/sitecore/content/Home/News"$oldTemplate = "User Defined/Old News Article"$newTemplate = Get-Item -Path "master:/sitecore/templates/User Defined/New News Article"# Find all items using the old template and change themGet-ChildItem -Path $rootPath -Recurse | Where-Object { $_.TemplateName -eq $oldTemplate } | ForEach-Object {Write-Host "Updating item: $($_.ItemPath)"Set-ItemTemplate -Item $_ -TemplateItem $newTemplateWrite-Host "Successfully updated '$($_.Name)' to use the new template." -ForegroundColor Green}Here’s what’s happening: Get-ChildItem grabs all items under our news folder. The pipeline then hands those off to Where-Object, which filters for only the items matching the "Old News Article" template. Finally, ForEach-Object cycles through the results, and the Set-ItemTemplate cmdlet does the heavy lifting.
This script is a perfect example of PowerShell's object-oriented muscle. The pipeline isn't just passing around text; it's passing fully-formed Sitecore item objects. This allows
Set-ItemTemplateto act on them directly—a core pattern you'll use constantly for Sitecore automation.
Archiving Old Documents in a SharePoint Library
Now, let's tackle SharePoint. Keeping document libraries tidy is crucial for good information governance. A classic task is to move old, untouched documents into an archive. For this, we’ll lean on the excellent PnP.PowerShell module.
Before you can script against SharePoint, you need to connect to your site. This usually involves setting up an App Registration in Azure AD for secure authentication, a process you can explore in our guide to SharePoint solutions. Once you’re in, you can start working with your lists and libraries.
Our script is going to do three things:
- Connect to a SharePoint Online site.
- Find all files in a document library that haven't been touched in over 365 days.
- Move those files to a dedicated "Archive" library.
# Connect to your SharePoint Online site (interactive login)Connect-PnPOnline -Url "https://yourtenant.sharepoint.com/sites/YourSite" -Interactive# Define variables$sourceLibrary = "Documents"$archiveLibrary = "Archived Documents"$archiveDate = (Get-Date).AddDays(-365)# Get items from the source library older than the archive date$itemsToArchive = Get-PnPListItem -List $sourceLibrary | Where-Object { $_["Modified"] -lt $archiveDate }# Move each item to the archive libraryforeach ($item in $itemsToArchive) {$sourceFileUrl = $item.FieldValues.FileRef$targetUrl = "/sites/YourSite/{0}/{1}" -f $archiveLibrary, $item.FieldValues.FileLeafRefWrite-Host "Archiving file: $($item.FieldValues.FileLeafRef)..."Move-PnPFile -ServerRelativeUrl $sourceFileUrl -TargetUrl $targetUrl -ForceWrite-Host "Successfully archived." -ForegroundColor Green}First, the script pulls all items from the "Documents" library. The Where-Object cmdlet filters this list down to just the files where the "Modified" date is more than a year ago. A foreach loop then goes through each old file and uses Move-PnPFile to send it over to the archive library.
By mastering these two examples, you’ve built a solid, practical foundation. Understanding how to manipulate Sitecore items and SharePoint files equips you to tackle much more complex automation challenges, saving your team time and ensuring consistency across your platforms.
Writing Secure Scripts for Your DXP Environment
It’s easy to get caught up in the power of automation, especially when you’re building scripts to streamline complex DXP tasks. But with great power comes great responsibility. When you create PowerShell scripts, you’re crafting tools that can read, modify, and even delete critical data in platforms like Sitecore or SharePoint. Without proper safeguards, that power can quickly turn into a massive security risk.
Security isn't an afterthought you tack on at the end. It needs to be baked into your scripting process from the very first line of code. The convenience of automation should never compromise your organization's data or its compliance obligations, particularly when your scripts handle sensitive information or administrative actions.
And the threat is very real. While PowerShell is a legitimate admin tool, its capabilities have made it a favorite among attackers. A chilling study from a major cybersecurity firm found that a staggering percentage of PowerShell scripts analyzed in threat intelligence sandboxes were malicious. That statistic alone underscores the urgency of securing every single script you deploy.
Locking Down Script Execution
Your first line of defense is controlling which scripts are even allowed to run on your systems. PowerShell has a built-in feature for this called the Execution Policy, designed specifically to prevent malicious scripts from running. On most Windows clients, the default is Restricted, which blocks all scripts.
For automation in a DXP environment, you'll obviously need something less restrictive, but opening the floodgates with an Unrestricted policy is a recipe for disaster. The best practice is to set your policy to AllSigned.
- Restricted: No scripts allowed. This is the default for a reason.
- AllSigned: Only scripts signed by a trusted publisher can run. This is the gold standard for enterprise environments.
- RemoteSigned: Local scripts can run unsigned, but scripts downloaded from the internet must be signed. It’s a decent middle ground, but
AllSignedis far more secure. - Unrestricted: Anything goes. You should avoid this in production at all costs.
By enforcing an AllSigned policy, you ensure that your DXP environment will only execute scripts that your team has explicitly verified and digitally signed. It's a simple, effective way to shut down a common attack vector.
The Importance of Code Signing
Once you commit to an AllSigned policy, the next logical step is code signing. Signing your PowerShell scripts is like putting a tamper-proof seal on a physical document. It gives you two critical security guarantees.
First, it proves authenticity—confirming the script came from you or your organization. Second, it ensures integrity, verifying that the code hasn't been modified since it was signed. If an attacker changes even a single character, the digital signature becomes invalid, and the AllSigned policy will prevent the script from executing.
Think of a signed script as an official company document. You wouldn't accept a critical business contract if it looked like it had been scribbled on after being signed. The same principle applies here; signing your code is a non-negotiable step for any script destined for a production Sitecore or SharePoint environment.
Managing Credentials Without Hardcoding
One of the most dangerous—and unfortunately, common—mistakes I see is hardcoding credentials like passwords, API keys, or connection strings directly in a script. This is a security nightmare. If that script is ever checked into source control or exposed on a file system, your secrets are out in the open.
The professional standard is to use a dedicated secrets management solution. For anyone working in the Microsoft ecosystem, Azure Key Vault is the clear choice.
Instead of embedding a plain-text password, your script authenticates to Azure Key Vault using a secure identity (like a Managed Identity) and requests the secret it needs at runtime. The credential is never stored in the code, never checked into source control, and never exposed on the server. This is a fundamental practice for building secure, enterprise-grade automation. You can explore this and other protective measures in our comprehensive guide on website security best practices.
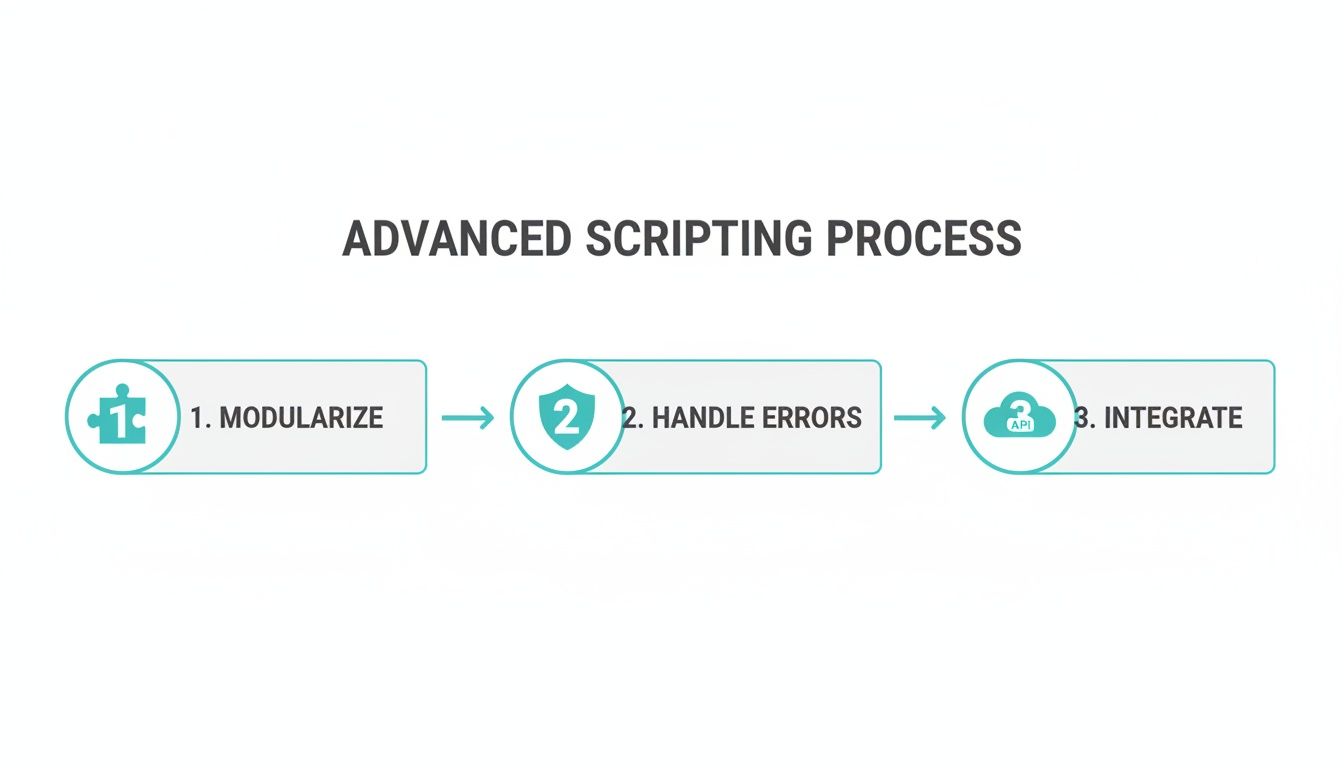
Advanced Scripting for Composable Architectures
When you're ready to move past one-off scripts, the real goal is to create PowerShell automations that are robust, reusable, and built for the enterprise. This is the leap from writing simple commands to engineering true automation assets that can handle the complexities of your DXP.
These advanced techniques are what separate a temporary fix from a long-term automation strategy for platforms like Sitecore and SharePoint. As you head toward a composable DXP architecture, where systems like Sitecore Search, Content Hub ONE, and external services need to talk to each other constantly, this kind of scripting isn't just nice to have—it's essential.
Building Reusable Functions and Modules
Stuffing all your logic into one giant script is a surefire way to create an unmaintainable mess. The second you catch yourself copying and pasting a block of code, that’s your cue: turn it into a reusable function. Functions are the building blocks of a clean, scalable script library.
For instance, you might find yourself constantly needing to clear different caches in a Sitecore environment. Instead of rewriting that logic every single time, build a function for it.
function Clear-SitecoreCache {[CmdletBinding()]param([Parameter(Mandatory=$true)][string]$SiteName)Write-Host "Clearing caches for site: $SiteName"# Logic to interact with Sitecore API to clear HTML, item, and data caches# Example: Invoke-WebRequest -Uri "https://$SiteName/sitecore/admin/cache.aspx?clear=1"Write-Host "Caches cleared successfully." -ForegroundColor Green}Once you’ve built a handful of related functions, the next logical step is to group them into a custom PowerShell module. A module (a .psm1 file) is a self-contained package of functions and variables you can import into any script with a single command.
This is a game-changer for team consistency. In a large organization managing multiple Sitecore instances, a custom module guarantees that every developer uses the same tested, approved code for common tasks like interacting with Sitecore AI or managing XM Cloud environments.
Robust Error Handling and Logging
A script without solid error handling is a time bomb waiting to go off in your production environment. When automations run unattended, you need to trust they will fail gracefully and, more importantly, tell you exactly what went wrong. This is where Try/Catch/Finally blocks become your best friend.
- Try: This block holds the code you expect to work.
- Catch: If anything in the
Tryblock throws an error, theCatchblock kicks in. This is your chance to log the error, send a notification, or try to recover. - Finally: This code runs no matter what, making it perfect for cleanup tasks like closing connections.
Try {# Attempt to publish a critical Sitecore item$item = Get-Item -Path "master:/sitecore/content/Home"Publish-Item -Item $item -PublishMode Smart -ErrorAction StopWrite-Host "Home item published."}Catch {# Log the specific error message to a file$errorMessage = "Failed to publish item. Error: $($_.Exception.Message)"Write-Output $errorMessage | Out-File -FilePath "C:\logs\sitecore_publish_errors.log" -Append}Finally {# This block always runs, e.g., to disconnect a remote sessionWrite-Host "Publish script finished execution."}Good logging is the other half of the battle. Instead of just writing to the console with Write-Host, use cmdlets like Out-File or Add-Content to create a detailed log file. This gives you an audit trail and is priceless for debugging a scheduled task that failed in the middle of the night.
PowerShell's deep integration into enterprise products has a long history. Its strength was demonstrated back in the mid-2000s when the entire admin GUI for Exchange 2007 was rebuilt on top of PowerShell cmdlets, setting a new standard for automation. You can read more about this history and the dynamics of technology adoption on Microsoft's developer blogs.
Integrating With Sitecore and SharePoint APIs
Modern DXPs don’t live in a vacuum; they're hubs in a much larger digital ecosystem. To build truly powerful automation, your scripts need to talk to APIs. For Sitecore's composable DXP offerings or a modern SharePoint environment, that almost always means working with REST APIs.
PowerShell’s Invoke-RestMethod and Invoke-WebRequest cmdlets are the workhorses for this. You can use them to pull data from a third-party service, push content updates into Sitecore, or kick off a workflow in another business system entirely.
Imagine you need to automate content tagging using Sitecore's AI capabilities. A PowerShell script could handle the whole process:
- Fetch content from Sitecore using Sitecore PowerShell Extensions cmdlets.
- Call the Sitecore AI API endpoint with
Invoke-RestMethod, passing the content to be analyzed. - Process the AI response, which might include suggested tags or a content summary.
- Update the Sitecore items with the new AI-generated metadata.
- Log the results of the entire operation for review.
This API-driven approach is the foundation of real enterprise automation. It allows you to orchestrate complex, multi-system workflows that would be a nightmare to handle manually.
Integrating Scripts into Your CI/CD Pipeline
An automation script sitting on a developer's machine is just a script. It only becomes a true business asset once it's woven into your DevOps workflow. Knowing how to create PowerShell scripts is half the battle; making them run reliably and automatically within a Continuous Integration/Continuous Deployment (CI/CD) pipeline is where the real value comes in for platforms like Sitecore and SharePoint.
By embedding PowerShell into tools like Azure DevOps or Jenkins, you can automate critical post-deployment tasks. Imagine a new release goes live—a pipeline can automatically trigger your script to clear specific Sitecore caches, publish essential content, or apply permissions to a SharePoint site. This completely removes manual handoffs, slashes deployment time, and gets rid of those "Oops, I forgot to..." moments.
This diagram shows how you can elevate a basic script into a pipeline-ready automation asset.
As you can see, pipeline integration is the final, crucial step that builds on a foundation of modular and error-resilient code.
Version Control Your Scripts with Git
Before any script touches a CI/CD pipeline, it has to live in a source control system like Git. Storing your .ps1 files in a repository—whether it's on GitHub, Azure Repos, or another platform—is non-negotiable for any serious automation work.
This practice brings a few critical benefits to the table:
- Change Tracking: Every single modification is recorded. You’ll always know who changed what, when they did it, and why.
- Rollbacks: If a new script version goes rogue, you can instantly revert to a previously stable version.
- Collaboration: Multiple team members can contribute to the same script library, merging their changes and resolving conflicts in a structured, manageable way.
Putting your scripts in Git is the first step toward treating them like what they are: valuable code. We dive deeper into this in our guide on version control best practices in CI/CD pipelines.
A Practical Pipeline Example for Sitecore
Let's walk through a common scenario: automating a Sitecore content publish right after a code deployment. In Azure DevOps, you can add a PowerShell task directly into your release pipeline.
The pipeline would look something like this:
- Build Stage: Your application code gets built and packaged up.
- Deploy Stage: The package is deployed to your Sitecore Content Management (CM) environment.
- Post-Deploy Automation: A PowerShell script task runs on the CM server.
This PowerShell task simply calls a script that you’ve already written and stored in your repository. To do this effectively, it helps to understand the different CI/CD platforms available and pick the one that best suits your tech stack.
Integrating PowerShell scripts directly into your release pipeline ensures that environment-specific actions happen consistently and without manual intervention. It transforms deployment from a multi-step checklist into a single, automated, and repeatable process.
Triggering SharePoint Library Updates
It works just as well for a SharePoint environment. A pipeline can automate all sorts of information governance tasks. Let's say you need to update the metadata on every document in a library after rolling out a new business process.
Your CI/CD pipeline, triggered either manually or on a schedule, would execute a PowerShell script using the PnP.PowerShell module. The script connects to your SharePoint site and handles all the updates. The key here is that the execution is automated and logged by your pipeline tool.
This process ensures that critical changes are applied systematically, every single time. You get a complete execution history, detailed logs for every run, and the assurance that the exact same logic is applied consistently—something that’s just not possible to guarantee with manual changes.
Common PowerShell Questions for DXP Automation
When you dive into automating complex platforms like Sitecore and SharePoint with PowerShell, you're bound to run into a few questions. Our team has spent years building automation for DXPs, so we've put together answers to some of the most common queries we get from developers and admins.
These aren't just textbook answers; they come from real-world experience in Sitecore and SharePoint environments.
What Are the Most Essential Modules for a Sitecore Developer?
If you're doing any work with Sitecore, the Sitecore PowerShell Extensions (SPE) module is non-negotiable. It’s the backbone of Sitecore automation, giving you a powerful set of cmdlets to work directly with the Sitecore API. Without it, you can't effectively manage items, users, roles, or publishing tasks.
Beyond SPE, there are a couple of other modules you'll want to have in your toolkit:
- Pester: This is the go-to framework for testing your scripts. Writing Pester tests is crucial to make sure your automation is reliable and won't break something in a live environment.
- Az Module: For any team running Sitecore on Azure, the 'Az' module is a must-have. It lets you automate everything in your cloud environment, from provisioning XM Cloud resources to managing infrastructure for your composable stack, which is vital for any modern Sitecore setup.
How Can I Debug a Complex PowerShell Script?
Debugging is an art, but you can start with the basics. Sprinkle Write-Verbose and Write-Debug throughout your script to get a running commentary on its execution flow and check variable values along the way.
For trickier problems, the built-in PowerShell debugger is your best friend. In an editor like Visual Studio Code, you can set breakpoints by clicking next to a line number or by using the Set-PSBreakpoint cmdlet. This lets you step through your script one line at a time, inspect every variable, and find exactly where things are going wrong.
A well-placed
try/catchblock is worth its weight in gold. It doesn't just stop your script from crashing—it captures specific exception details, telling you exactly why a command failed instead of giving you a vague error.
What Is the Best Way to Handle Credentials Securely?
Whatever you do, never hardcode passwords or API keys directly in your scripts. It's a massive security risk and a common mistake. The professional way to handle secrets is with a dedicated tool like Azure Key Vault.
This approach lets your script securely grab credentials when it runs, so they're never exposed in your code. The script authenticates to the vault using a managed identity or a certificate, and the vault hands over the secret. This centralizes all your secrets, lets you set up rotation policies, and gives you a clear audit trail—a must-have for any enterprise.
Once you create PowerShell scripts, you also need to present the output in a clean, readable way. You can learn how to generate clear, structured reports from your automation tasks by Mastering Format Table PowerShell.
At Kogifi, we specialize in building robust DXP solutions on platforms like Sitecore and SharePoint. If you need expert guidance to build secure, scalable automation for your enterprise, our teams are ready to help. Visit us at https://www.kogifi.com to learn more.