

Clearing your Cloudflare cache is straightforward. You can use the “Purge Cache” feature in the dashboard to do a Custom Purge on specific files or a Purge Everything to invalidate all cached content at once. This forces your website to serve fresh content directly from your origin server.
Why and When to Clear Your Cloudflare Cache
Before getting into the how, we need to talk about the why. For massive platforms like Sitecore AI and SharePoint, managing your Cloudflare cache is a strategic move, not just a technical chore. It's all about making sure your digital experience platform (DXP) stays current, fast, and reliable.
Knowing when to clear the cache is what separates a well-managed site from one that feels buggy or outdated. The answer isn't always to purge everything right away. Sometimes, just letting the cache's Time To Live (TTL) expire is the smarter move. It's a balancing act that protects your origin server from getting slammed with requests while keeping your digital presence sharp.
Scenarios That Demand a Cache Purge
Some situations just can't wait. When you're dealing with high-stakes updates, outdated content can lead to user confusion, lost revenue, or even security risks.
Think about these real-world scenarios:
- Critical Code Deployments: You've just pushed a hotfix for a major bug or rolled out a game-changing new feature. You need every single user to get that new code immediately.
- Urgent Content Updates: A press release just went live, you found a major typo in a product description, or you need to publish a product recall notice. This information has to be visible to everyone, right now.
- Design and Branding Rollouts: When you launch a new website design or a complete rebrand, you can't have visitors getting a mixed experience. Consistency is key from the moment you go live.
In these cases, if you don't clear the cache, some users will keep seeing the old, broken, or outdated version of your site. It completely undermines the point of the update.
The most decisive tool you have is Cloudflare's 'Purge Everything' feature, a function that’s been a core part of their cache management since the platform's early days. This single click instantly invalidates all cached resources across Cloudflare's global network.
When you execute this, every single asset is wiped from the cache, forcing all subsequent requests to hit your origin server. For a high-traffic enterprise site, this can cause origin requests to spike significantly and slow load times until the cache repopulates. You can find more details on this in Cloudflare's official documentation.
The Strategic Value of Selective Caching
While a full purge is powerful, it’s a bit like using a sledgehammer to crack a nut. A more refined, selective approach is a fundamental best practice for any scalable DXP architecture. Taking a step back to see how your application fits into the larger infrastructure highlights why effective cache management is so vital for overall cloud computing scalability.
For routine changes—like fixing a typo in a blog post or adding a new article—a site-wide purge is usually overkill. A far more efficient strategy is to simply let the cache's TTL expire on its own. Caching is, after all, a proactive tool for maintaining peak performance and agility.
This proactive mindset is key. Read also: our complete guide on how to optimize website performance.
Choosing the Right Cloudflare Purge Method
When you need to clear your Cloudflare cache, the method you choose has a direct impact on site performance and your team's workflow. Getting this right is crucial for maintaining a fast, reliable digital presence. It’s the difference between surgical precision and hitting the reset button on your entire system.
You essentially have two main paths: a Custom Purge (targeting a single file/URL, tag, or hostname) and the more drastic Purge Everything. For enterprise platforms like Sitecore AI, where thousands of assets work together, picking the right method isn't just a technical detail—it's a core operational strategy. One wrong move can tank the user experience and overload your origin server.
The Power of Precision with Custom Purges
For most day-to-day updates, a Custom Purge is your go-to tool. This approach allows for targeted invalidation, which is absolutely essential for modern composable DXP architectures. Instead of wiping the entire cache, you only remove the specific assets that have actually changed.
This granular control is available in a few different flavors:
Purge by URL: Perfect for quick, isolated changes. If the marketing team fixes a typo on a landing page or swaps out an image on a blog post, purging that single URL is the most efficient move. It removes only that one file, leaving the rest of your cached content untouched.
Purge by Hostname: This is a broader stroke, clearing all assets tied to a specific hostname (like
www.yourdomain.com). It's less common but can be useful during certain deployments where an entire subdomain’s content needs to be refreshed at once.Purge by Tag: This is by far the most powerful and strategic option, especially for complex platforms like Sitecore or SharePoint. By assigning cache tags to related content—say, all assets for a new product campaign or all components on the homepage—you can purge an entire group of files with a single command. It's a lifesaver for big product launches or site-wide promotional updates.
Imagine you're launching a new feature powered by Sitecore AI's personalization engine. By tagging all the related components, product details, and marketing banners, you can instantly refresh that entire experience for users without touching unaffected parts of your site, like the "About Us" page or the corporate blog.
Comparing Cloudflare Cache Purge Methods
Choosing the right purge method is about balancing speed with performance. The wrong choice can lead to slow load times and a poor user experience, while the right one ensures your site remains fast and responsive.
This table breaks down the different options to help your team make the right call every time.
| Purge Method | Best For | Performance Impact | Recommended For |
|---|---|---|---|
| Purge Everything | Emergencies, critical security updates, major site-wide failures. | High. Forces all traffic to the origin server, causing significant slowdowns. | Reserve for "break glass" scenarios only. Avoid for routine updates. |
| Custom Purge by URL | Single file changes like a blog post typo or an updated image. | Very Low. Only the specified asset is refetched from the origin server. | Daily content updates and minor fixes. The most common and safest method. |
| Custom Purge by Tag | Coordinated updates involving multiple related assets (e.g., product launch). | Low to Medium. Impact is limited to the group of assets sharing the tag. | Enterprise CMS/DXP workflows where content is logically grouped. |
| Custom Purge by Hostname | Refreshing all content on a specific subdomain (e.g., blog.yourdomain.com). | Medium to High. All assets on the hostname are refetched from origin. | Use with caution, typically during specific deployment scenarios. |
Ultimately, a targeted approach like Purge by URL or Tag should be your default strategy. The "Purge Everything" button should be treated with extreme caution and used only when absolutely necessary to avoid unnecessary strain on your infrastructure.
The Risks of a Full Purge
The Purge Everything option is exactly what it sounds like—it invalidates every single file in your cache across Cloudflare's entire global network. While it guarantees that all visitors see fresh content, it comes at a steep price.
Using "Purge Everything" should be reserved for genuine emergencies. Think of it as the "break glass in case of fire" option for your cache. It’s effective but has major performance consequences.
When you purge everything, every single request from a visitor has to go back to your origin server to fetch the content. This sudden flood of traffic can easily overwhelm your server, leading to dramatically slower page load times and a frustrating user experience until the cache slowly repopulates. For a high-traffic SharePoint intranet or a customer-facing Sitecore portal, this translates to noticeable lag and unhappy users.
This flowchart helps visualize when a purge is truly needed versus when it's better to just let the TTL expire naturally.
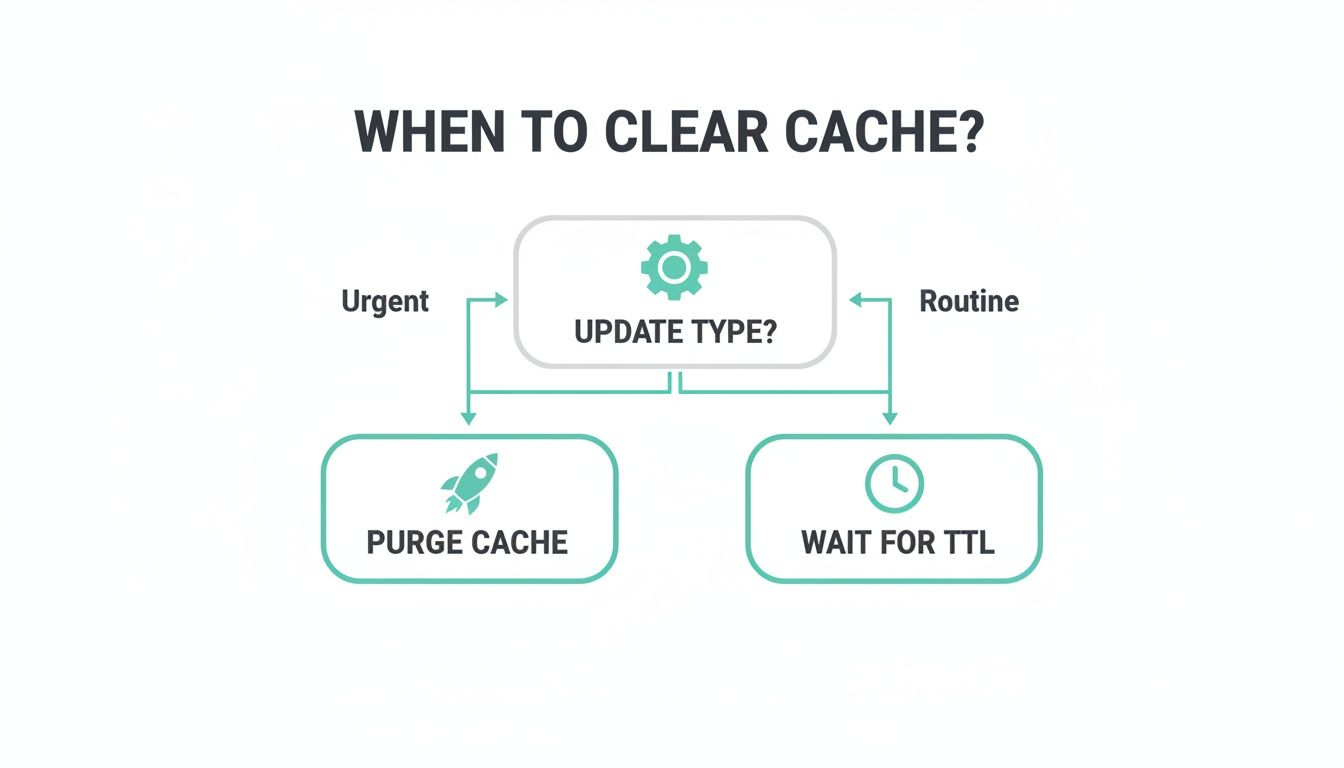
The key takeaway is simple: urgent updates require an immediate cache purge, but for routine changes, letting the cache expire on its own protects your server and ensures a smooth user experience. This strategic patience is the hallmark of a well-managed digital platform.
A full purge forces an identical scenario to a cache-miss DDOS attack, where every request hits your origin. For platforms like Sitecore, which rely on complex data fetching and rendering logic, this can be catastrophic. Each component, personalization rule, and content item must be re-fetched from the database and re-rendered, multiplying the server load exponentially.
Purging Cache with the Cloudflare Dashboard

For most teams, especially on the content and marketing side, the Cloudflare Dashboard is the go-to tool for managing the cache. It offers a straightforward visual interface that turns a potentially complex technical task into just a few clicks. This is perfect for non-technical users who need to refresh content quickly without touching a command line.
This walkthrough will show you exactly how to clear cache Cloudflare style, directly from the dashboard. We'll go beyond the basics, adding practical tips from our experience managing enterprise platforms like Sitecore AI and SharePoint.
Performing a Custom Purge
When it comes to daily cache management, a Custom Purge is your best friend. It lets you target specific files or groups of assets for removal, leaving the rest of your cached content untouched. Think of it as a surgical strike that protects your origin server from getting slammed with requests.
To get started, head to the Caching section in your Cloudflare Dashboard and click on Configuration. This is where you'll find the "Purge Cache" controls.
You have a few different options for a Custom Purge:
- Purge by URL: This is for zapping a single file. You need the complete, exact URL, including the
http://orhttps://. For example, if you just updated a single blog post on your SharePoint site, you’d paste its full URL here. - Purge by Tag: This option is incredibly powerful, especially for DXP workflows. In a Sitecore AI setup, you can assign cache tags to related assets, like everything associated with a new marketing campaign. Purging by tag removes that entire group in one go.
- Purge by Host: This clears everything cached for a specific hostname (like
blog.yourdomain.com). Use this one with care—it has a much bigger impact than a URL or tag purge and is less commonly needed.
As you can see, Cloudflare keeps the different custom purge methods neatly separated, so you can always grab the right tool for the job.
Using the Purge Everything Function
Then there's the "Purge Everything" button. This is the big red button, the nuclear option. Clicking it tells Cloudflare to invalidate every single cached asset for your domain across its entire global network. While it sounds simple, the consequences are massive.
"Purge Everything" should be reserved for true emergencies. Think of it as a last resort for situations like a critical security patch or a major site-wide bug that demands an immediate, total refresh.
Using this function means that for a period, every single visitor request will bypass the cache and hit your origin server directly. This sudden flood of traffic can easily overwhelm your infrastructure, causing slow load times, higher server costs, and a frustrating user experience until the cache starts to repopulate.
Verifying a Successful Purge
So, you’ve hit the button to clear the cache in Cloudflare—how do you know it actually worked? The invalidation command itself is usually sent across the globe in under 30 seconds. But that doesn't mean your new content is live everywhere just yet.
The old content is gone, but the new content only gets re-cached when someone actually requests it.
Here’s how to confirm the purge was successful:
- Use a Private Browser Window: Open an incognito or private browsing session to visit the URL. This bypasses your local browser cache and ensures you’re not just looking at an old, saved version of the page.
- Check the Headers: Fire up your browser’s developer tools and inspect the network request for your asset. Look for the
cf-cache-statusheader. If it saysMISS, it means Cloudflare didn't have a cached copy and had to fetch it from your origin server—proof the purge worked. If it saysHIT, you’re still seeing a cached version. - Monitor Analytics: In the Cloudflare Dashboard, check out the Analytics section. Right after a purge, you should see a temporary dip in your cache hit ratio and a matching spike in traffic to your origin. This is the clearest sign that the purge has taken effect.
By understanding these simple verification steps, even non-technical team members can confidently manage cache purges, ensuring content on your Sitecore and SharePoint sites is always up-to-date without hurting performance.
Automating Cache Purges with the Cloudflare API

Let's be honest: for any serious DXP, manually clearing the cache by clicking buttons in a dashboard just doesn't cut it. It’s slow, prone to human error, and simply not a scalable strategy for modern development. This is where you bring in the big guns: the Cloudflare API.
By automating how you clear cache cloudflare purges, you transform cache invalidation from a reactive headache into a seamless part of your development workflow. It ensures content is always fresh, minimizes mistakes, and shields your origin server from the performance drag of unnecessary "purge everything" clicks.
The Power of CI/CD Integration
The best way to leverage the API is by plugging it directly into your CI/CD pipeline. This is a game-changer for complex platforms like Sitecore or SharePoint, where content and code updates happen all the time.
A mature Sitecore implementation integrates publishing workflows directly with the Cloudflare API. When a content editor publishes an item in Sitecore, a custom event handler can automatically identify the affected URLs and their associated cache tags. This triggers a targeted API call to Cloudflare, purging only the specific page and its related components, such as personalized content blocks managed by Sitecore AI.
That webhook then makes a targeted API call to Cloudflare, purging only the specific URL that changed. You get a completely hands-off process that updates your content worldwide in seconds. This removes a major operational bottleneck and lets your content team move faster.
Authentication and API Tokens
Before you can start making API calls, you need to handle authentication securely. The way to do this is by creating a dedicated API Token in your Cloudflare account, and it's vital to follow the principle of least privilege.
When setting up automation for cache purges, ensuring secure access to the Cloudflare API is paramount. Understanding API authentication best practices can help safeguard your operations.
Stick to these simple security rules:
- Create Scoped Tokens: Never use your Global API Key for this. Create a new token with permissions set only to "Cache Purge."
- Limit Zone Resources: Lock the token down so it can only operate on the specific zones (domains) it needs to manage.
- Use Environment Variables: Never, ever hard-code your API token into scripts or source code. Store it as a secure environment variable (
CF_API_TOKEN) in your CI/CD system.
A compromised API token with wide-ranging permissions is a huge security hole. By creating a token just for purging cache, you dramatically limit the potential damage if that key ever gets exposed.
Practical API Purge Examples
With authentication sorted, you can run any type of purge through the API. The calls are simple POST requests to the Cloudflare API endpoint, carrying a JSON payload that tells Cloudflare exactly what you want to invalidate.
For developers ready to get their hands dirty, here are a couple of real-world examples using cURL.
Example 1: Purging a Single File (URL)
This is the most common and safest type of automated purge. It’s perfect for hooking into a CMS publish event.
curl -X POST "https://api.cloudflare.com/client/v4/zones/YOUR_ZONE_ID/purges"
-H "Authorization: Bearer YOUR_API_TOKEN"
-H "Content-Type: application/json"
--data '{"files":["https://www.your-sitecore-site.com/blog/new-post"]}'
Example 2: Purging by Tag
This method is incredibly useful for larger updates, like a product launch on a Sitecore site where dozens of pages and assets share the same Cache-Tag.
curl -X POST "https://api.cloudflare.com/client/v4/zones/YOUR_ZONE_ID/purges"
-H "Authorization: Bearer YOUR_API_TOKEN"
-H "Content-Type: application/json"
--data '{"tags":["product-launch-2024", "homepage-promo"]}'
This one API call instantly invalidates everything tagged with product-launch-2024 or homepage-promo. It’s a powerful way to manage updates for related content. For those interested in maximizing their infrastructure, our article on unlocking performance with a managed cloud service provides further insights.
By building these API calls into your deployment scripts and CMS webhooks, you create a robust, automated system. Your digital experience stays current, performant, and free from the risks of manual cache management.
Enterprise Caching Best Practices for Sitecore and DXP

Anyone can clear a Cloudflare cache. But doing it strategically is what sets a high-performing digital platform apart from the rest. For enterprise clients running complex systems like Sitecore AI or SharePoint, cache management is far more than just making updates appear—it’s a crucial lever for performance, cost control, and user experience.
A reactive, "just nuke it" approach where teams frequently clear cache Cloudflare-wide often creates more problems than it solves. Instead, you need a proactive strategy built on precision and automation. That’s how you deliver the fast, reliable, and scalable experiences expected from a modern Digital Experience Platform (DXP).
The True Cost of a Full Cache Purge
We’ve all seen it: the big red "Purge Everything" button. It’s tempting. It offers a quick, definitive fix when content looks stale. On a high-traffic enterprise site, however, clicking it can be disastrous.
When you trigger a full purge, you’re telling Cloudflare to forget everything it knows about your site. Every single visitor request—from images to APIs—is forced back to your origin server, all at once.
This immediately creates two huge problems:
- The Thundering Herd Problem: A massive wave of traffic that was being smoothly handled by Cloudflare's global network suddenly slams into your origin servers. This spike can easily overwhelm your infrastructure, leading to slow responses, database errors, and, in a worst-case scenario, a full-blown outage.
- Degraded User Experience: As your servers buckle under the load, page load times tank. For an e-commerce site on Sitecore with advanced personalization, where every component might be a separate call, this delay is magnified. Users who expect sub-second speed are left waiting, which directly hurts conversions and your brand's reputation.
Performance Consequences of Inefficient Purging
The key metric that suffers from a full purge is your cache hit ratio—the percentage of requests served directly from Cloudflare’s cache without ever touching your origin. A well-tuned site can easily maintain a cache hit ratio of 70-85% or even higher. After a full purge, that number drops to nearly zero.
Cloudflare's own data from its cache changelog findings warns that full purges on busy sites can cause up to 3-4x more cache misses immediately afterward. In the context of Sitecore, this is especially damaging. The platform’s HTML cache, item cache, and data cache all become ineffective when every request hits the origin, forcing repeated, expensive database queries and rendering cycles that a CDN is meant to prevent.
The fallout is tangible: higher server costs as your infrastructure scrambles to scale and a noticeable drop in site speed, a factor that directly impacts both user satisfaction and SEO rankings.
Making Granular Purging Your Default Strategy
The cornerstone of a smart enterprise caching strategy is to stop using "Purge Everything" as a routine tool. Your default actions should always be granular, targeted purges that minimize disruption. This means making Purge by URL and, more powerfully, Purge by Tag your go-to methods.
Your team's philosophy should be to make 'purge-by-tag' or 'purge-by-URL' the default action. A full cache purge should be reserved for genuine, site-wide emergencies only.
The key is implementing Cache Tags within your Sitecore or SharePoint environment. By programmatically assigning tags to related content, you gain surgical control over your cache.
For example:
- Tag all assets tied to a new promotion with
campaign-summer-sale. - Group all components on your homepage under the tag
homepage-assets. - Link a product, its reviews, and its images with a shared tag like
product-id-12345.
When a change happens, you no longer need to clear the cache Cloudflare-wide. A single API call to purge the relevant tag is all it takes. This invalidates only the necessary files, leaving the rest of your site’s cache warm, intact, and performing at its peak. For more tips on getting your setup right, see our guide on 8 ways to optimize your Sitecore performance.
This approach delivers the best of both worlds: content updates are reflected almost instantly, while the integrity and performance of your cache remain strong. It's the most scalable, cost-effective, and user-friendly way to manage caching for any modern enterprise platform.
Frequently Asked Questions About Cloudflare Caching
Even with a great plan for how you clear cache Cloudflare-style, a few questions always come up. We see these all the time when helping enterprise teams manage caching for platforms like Sitecore AI and SharePoint, so here are some quick answers.
How Long Does a Cloudflare Cache Purge Take to Complete?
A cache purge command—whether for one URL or a full "Purge Everything"—is incredibly fast. It typically ripples across Cloudflare's entire global network in under 30 seconds. That’s how long it takes to invalidate the old content.
But invalidation isn't the same as repopulation. The new, fresh content only gets pulled from your origin server and cached again when a user actually requests it. For high-traffic pages, this happens almost instantly. For less popular assets, it might take a bit longer for the cache to get rebuilt.
Will Clearing My Cache Affect My SEO?
Indirectly, yes, it can. The act of purging the cache itself doesn't directly ding your SEO rankings. The real risk comes from the performance dip that can happen right after, especially with a "Purge Everything" action.
Here’s how it breaks down:
- Site Speed is a Ranking Factor: Frequent full purges can create temporary slowdowns for users and, just as importantly, for search engine crawlers.
- Chronic Performance Issues: If you're constantly purging everything and causing slowdowns, this consistent poor performance could hurt your SEO over time.
- Targeted Purges Minimize Risk: This is exactly why targeted purges (by a specific URL or tag) are the best practice. You minimize the performance hit, which protects both the user experience and your hard-earned SEO standing. To keep an eye on this, it's worth checking out some common website performance monitoring tools.
What Is the Difference Between Cache TTL and Purging?
Getting the difference between TTL and purging is crucial for a smart caching strategy, especially on platforms like Sitecore that serve a mix of dynamic and static content.
Cache TTL (Time To Live) is a proactive, set-it-and-forget-it instruction. It’s a header you define that tells Cloudflare exactly how long to hold onto a file before it should automatically check your origin server for a newer version. You use TTL for predictable updates—like a long TTL for static assets and a shorter one for content that changes more regularly.
A Cache Purge, on the other hand, is a reactive command you issue manually or through an API. It forces Cloudflare to immediately get rid of a cached file, no matter what its TTL was. You use purging for urgent, unplanned updates that just can't wait for the TTL to expire.
TTL is for routine expiration, while purging is for immediate invalidation. A well-configured Sitecore or SharePoint environment uses both: TTL for general content lifecycle management and purges for critical, on-demand updates.
Can I Undo a Cache Purge?
No, you can't. A cache purge is permanent. Once you tell Cloudflare to invalidate assets, they're gone from the cache, and there’s no "un-purge" or rollback button.
The only way to get content back into the cache is for it to be requested again, which triggers Cloudflare to grab a fresh copy from your origin server. This finality is another big reason to be very careful with your purges, especially when you're thinking about using the "Purge Everything" option.
At Kogifi, we specialize in building and managing high-performance Digital Experience Platforms. If your team needs expert guidance on optimizing your Sitecore or SharePoint caching strategy, get in touch with our experts today.